Physical Data
| Melting Range | 1300°c-1340°C (2372°F-2444°F) | Casting Temp | 1450°C (2640°F) |
|---|---|---|---|
| Hardness | 340 HV | CTE | - |
| Yield Strength | 105,000 PSI | Tensile Strength | 115,000 PSI |
| Elongation | 6,50% | Density | 8,40 g/cm3 |
| Specific Gravity | 4,4 g/cm3 |
Section I
Material Identification
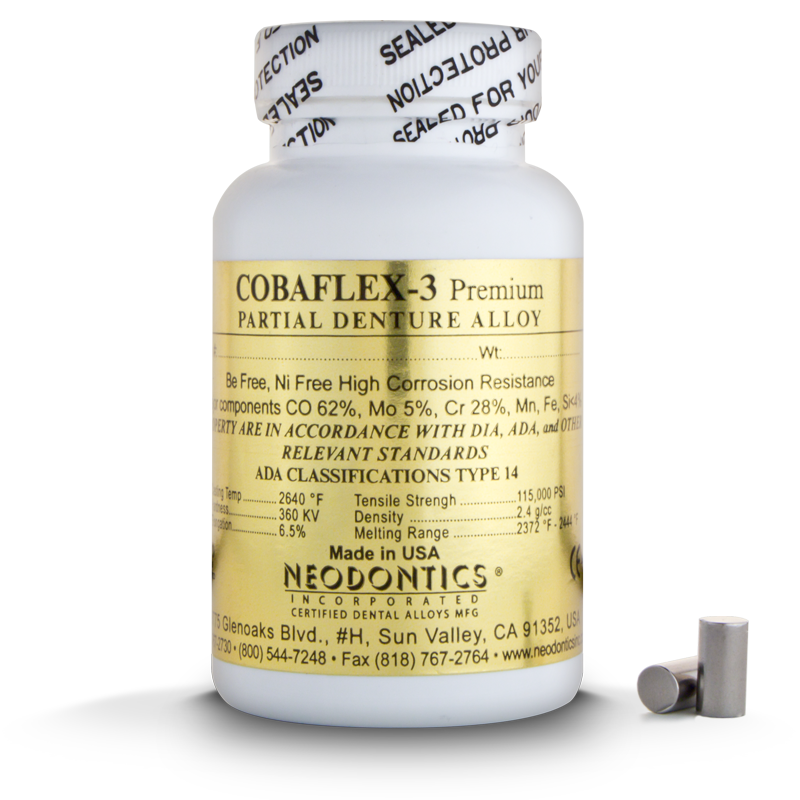
Chrome-Cobalt Base Premium Partial Denture AlloyTrade Name
Non-Precious AlloyCommercial Name
Cobaflex-3Section II
Ingredients & Hazards
| Ingredients | Cas # | % Composition by weight |
|---|---|---|
| Cobalt (Co) | (7440-48-4) | 61 - 63% |
| Chromium (Cr) | (7440-47-3) | 27 - 29 % |
| Molybdenum (Mo) | (7439-98-7) | 5 - 6 % |
| Silicon (Si) | (7440-21-3) | <1 % |
| Manganese (Mn) | (7439-96-5) | 1% |
| Iron (Fe) | (7439-89-6) | <1% |
| Carbon (C) | (7440-44-0) | 0.30-0.35% |
| Nitrogen (N) |
Solid Form
- Fire and explosion resistant
- Insoluble in water
- No odor
- Non-toxic
- In solid form no special precautions are required
Hazard Data
- Chromium Eight (8) hr. Tlv – 5 mg/m3
- Molybdenum Eight (8) hr. Tlv – 1 mg/m3
- Silicon Twa – 10 mg/m3
Technical Data
| Melting Range | 1300° – 1340° C (2372° - 2444° F) |
| Yield Strength | 105,000 PSI |
| Tensile Strength | 115,000 PSI |
| Elongation | 6.5% |
| Density | 8.40 (g/cm³) |
Casting and Grinding
During casting and grinding avoid inhalation of fumes and dust. Exposure to large concentrations of dust may cause industrial dermatitis and respiratory tract irritation. Chronic exposure to Cobalt may cause pulmonary hypersensitivity.
Wear protective clothing. Melt, grind and polish in presence of adequate ventilation. Use respirator, goggles, gloves, coveralls, or protective clothing.
Although reasonable care has been taken in gathering information from the sources which we believe are reliable for preparation of this documents, we extend no warranties and make no representation as to the accuracy or completeness of the information contained, and assume no responsibility regarding suitability of this information for the user's intended purpose or for the consequences of its use.
INVESTMENT
Use investments recommended and acceptable for high-heat Chromium-Cobalt partial denture alloys only. For proper mixing and investing procedures, consult the investment manufacture's instructions and specifications. Burnout at the temperature and time recommended by the investment manufacturer or at a minimum of 1,850°F (1,010°C) for 1.5 hrs.TORCH CASTING
- Use a single-orfice tip or a multi-orfice tip.
- Set gauge at 20 psi oxygen and 8 psi acetylene.
- Light torch and increase acetylene and oxygen flow until you hear a hissing sound.
- Adjust torch using acetylene valve so that the bright cone is approximately 1/8" (3mm) from the tip. The second inner cone would be approximately 1.5" (38mm) from the tip. Beyond the second tip will be the outer cone or brush flame.
- If a spring type casting machine is used, give the arm three to four turns on an average casting.
- Place a sufficient amount of alloy in the preheated crucible.
- Applying flame to the metal, keep the inner cone (the second larger cone) about 1.5" (38mm) from the metal. With a slight rotary motion, heat the alloy evenly until the alloy begins to melt. At this point, drop a small amount of flux onto the heated metal to make the pieces flow together. When the metal melts into a single mass, release the casting machine arm.
- Allow the casting arm to rotate for a minimum of twenty seconds. Then, stop machine arm and remove the mold and set it aside to bench cool.
INDUCTION CASTING
It is crucial to follow the manufacturer's instructions in the operation of your specific equipment, due to the various types of induction machines available on the market (such as Manual, Semi-Automatic, and Fully Automatic, etc.). Exercise care in placing virgin metals or buttons in the crucible. Do not drop in ingots. Instead, use large tweezers to load the crucible, which will help prevent cracking of the crucible. For manual operators, when all the metal has melted together as one joined mass, release machine immediately to prevent overheating of the metal.FINISHING STEPS
- Cut the sprues close to the casting with a thin cut-off wheel to remove the buttons.
- Trim remaining metal from sprues and shape to the case design by using a heavy cut-off wheel.
- Use a large Barrel Stone (No.5) to grind the surface of lingual and palatal bars and shape the finish line areas on upper cases.
- Clean up the inside of clasps and uprights with Taper Stone (No.3) and avoid grinding under the rest of the area.
- Grind or trim tight areas with an Inverted Cone (no.2).
- After fitting the casting to the model, go over the entire case with a Small Barrel Stone (No.1) to prepare the surface for polishing.
- Do not stone the stippled surfaces. They should be electropolished or harperized and the high shined.
- At this point, the casting should be sandblasted and ready for polishing.
CONVENTIONAL ELECTROPOLISHING
Use conventional electropolishing systems accepted and recommended for high-heat Chromium-Cobalt partial denture alloys only. Consult manufacturer's instructions and specifications for proper operating procedures. Follow chemical / material requirements. Once conventional electropolishing is complete, remove case from the solution and rinse thoroughly with water. Areas that have been ground will require rubberizing to attain smooth surface (rubber wheel areas, saddle areas, and finishing lines). Rubber point all clasps and go over all surfaces that have been rubber wheeled. Attach a bristle brush and apply a pre-buff compound directly to the bristles with a low speed lathe (1750 RPM). Go over the entire case in this manner to remove all surface marks left by the rubber point. Apply a high shine compound to a felt wheel and a point to attain a brilliant finish and then clean the case in an ultrasonic cleaner.ACETYLENE / OXYGEN WELDING STEPS
- Prepare the parts to be welded by grinding or sandblasting to a clean surface, and then invest.
- Thick areas are to be ground to a "V" shape so that the top the surface is wider than the bottom.
- Adjust the gauges to 1psi oxygen and 1psi acetylene.
- Light the torch and adjust it to a neutral flame with approximately a ½" (12mm) blue cone extended from the torch tip.
- Heat the end of the welding rod and dip it into the powdered flux (not necessary when using paste flux).
- Heat both parts to be welded and bring to an even red color. Place the welding rod between the parts to be welded and proceed to melt.
- Keep the torch about ½" (12mm) from the area to be welded.